Photographing Glass
Taking good quality pictures of glass objects can seem intimidatingTaking good quality pictures of glass objects can seem intimidating. There are some simple techniques which can be followed to obtain dramatic results with minimal effort. The following examples show three:-
These techniques get instant, fast, clean shots of clear glass. The techniques illustrate dark field and light field photography.
Set up 1
In this technique, under lighting was used to light some glass objects to give very dramatic, impressive results.The lighted panel will create the same special effect with acrylic cosmetics and perfume bottles. Translucent acrylic and glass respond dramatically to the under lighting technique.
Bottle with liquid inside placed on top of the lighted panel. The liquid will really lights up!
Two Lights position on the side. Light position underneath
 |
| F29, 1/60 ISO 100 |
 |
| Set Up 1 |
 |
| F22 , 1/60 ISO 100 Picture from set up 2 |
 |
| Set Up 2 |
Set up 2
Single light source was used to create shadows with the glass, works well with coloured glass.Set up 3
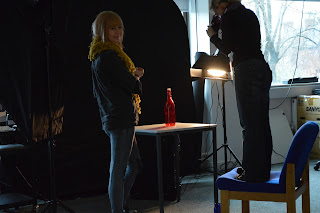
This illustrates dark filed photography. Here black sheet was lit up from behind. Two lights either side of the glass. The background creates the illusion of light falling off into blackness. Dark card can be held over the glass to create black reflections back into the stem or to top of the glass to further help define shape.
Two Lights position on the side. Light position in back on black sheet
 |
| Set up 3 - F22, 1/60 ISO 100 |
 |
| Set up 3 - F20, 1/60 ISO100 |
 |
| Set up 3 - F20, 1/60 ISO 100 |
Add lighting from both sides ( so it will be soft and diffused without harsh light reflections).
Insert black paper . (This adds nice black reflections back into the stem, to help define the shape).
Glass edges disappear against a light background. Black paper adds definition to the edge of the glass
No comments:
Post a Comment